April 21, 2026
NemoClaw, Bigdata, Telegram/30 minutes read
OpenClaw arrived and then everyone started talking about agents. It paved the way for new businesses at the same time it made others obsolete.
Now the topics in everyone’s mind are personal agents and teams comprised exclusively of agents. One thing that complicates the idea
of agents being used by companies, however, is the security aspect: these agents are designed to be powerful and self-sufficient, which means
they need a good model and access to your credentials.
In this post, we explore how to give access to the financial knowledge of Bigdata to an OpenClaw agent running with NVIDIA’s NemoClaw connected with Telegram. NemoClaw adds several layers of protection so the final agent can make requests to only some domains and does
not know about ANY of our API keys.
By the end, you’ll be asking your Telegram bot about earnings and market news — with zero API keys exposed to the agent.
1
Create a Telegram bot
2
Install NemoClaw and pair it to the Telegram bot
3
Access OpenClaw dashboard
4
Open the firewall to Bigdata
5
Set up the Bigdata API key and wire it into the sandbox
6
Turn the experience to eleven: install the build-with-bigdata skill
7
See the agent in action
How to read the commands in this guide
How to read the commands in this guide
The agent runs in an isolated sandbox, separate from your Mac. Commands in this guide target one of those two environments — check the prefix before copying anything:
nemoclaw and openshell are the management tools that live on your Mac and talk to the gateway from outside. openclaw is the agent runtime that lives inside the sandbox — running it locally won’t work because it has no gateway to connect to.Before you start
You’ll need:- macOS with Node.js and Docker Desktop (or Colima) running.
- A Telegram account.
- An API key for your inference provider. NemoClaw supports several — NVIDIA Build, OpenAI, Anthropic, and others. Pick whichever you have access to.
Step 1 — Create a Telegram bot
We will create a Telegram bot to configure in the personal agent, so we can use Telegram to communicate with it.Don’t get hacked in step 1!
There are bots that look similar, so ensure you pick the official ones; they will have a blue checkmark next to their names. Use the following two: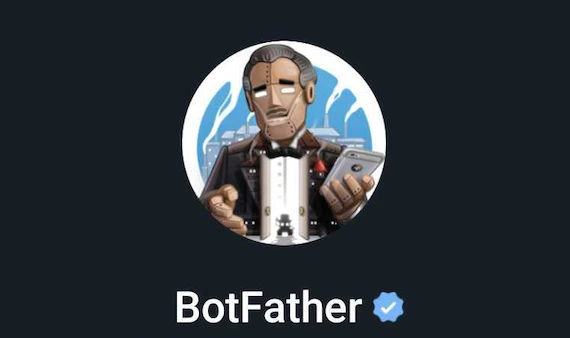

@username. BotFather replies with a token that looks like 123456789:ABCdef.... Keep it handy — ideally, store it in your password manager.
You will also need your Telegram User ID:
Message @userinfobot and copy your numeric user ID. NemoClaw will allowlist exactly this ID so only you can DM your bot.
Step 2 — Install NemoClaw and pair a Telegram bot
Open Docker Desktop and wait for the whale icon to stop animating. Then you can install NemoClaw with the following command:Are you getting a cryptic connection error halfway through?
Are you getting a cryptic connection error halfway through?
Make sure Docker Desktop (or Colima) is running or run
docker info and confirm it returns without error.my-assistant. Don’t worry about giving the agent this bland name; once you start chatting, you can give the agent a name, and it will adopt that identity.
Follow the guide. These are three of the configuration steps:
- Inference provider: Pick whichever provider you have an API key for (NVIDIA Build, OpenAI, Anthropic, and others are supported). Enter the key when prompted.
- Messaging channels: Enable Telegram. Enter your bot token and your Telegram user ID (the numeric one from
@userinfobot) so only you can DM the bot. - Policy tier: Select
Restrictedand then make suretelegram,github, andpypiare selected:telegramopensapi.telegram.org:443so the bot can send and receive messages.githubopensgithub.com+*.githubusercontent.comso your agent can later download the Bigdata skill from GitHub.pypiopenspypi.orgso we can install Python packages. We give access to every PyPI repo; however, once we finish the installation and download the required packages, we will remove this policy. When it finishes, you have:
nemoclawandopenshellin~/.local/bin(add to your PATH if not already there).- A running gateway (
openshell-cluster-nemoclawcontainer). - A sandbox named
my-assistantwith the OpenClaw agent inside. - A live Telegram channel polling for your messages from inside the sandbox.
- Network rules already open for Telegram, GitHub, and PyPI.
What just happened? Your Telegram message hit Telegram’s servers, your sandbox polled them through an explicitly allowlisted route (api.telegram.org:443), the OpenClaw agent generated a response with an LLM, and the response was sent back through the same allowlisted route. No port was opened on your Mac. No credential left the gateway in plaintext.
Step 3 — Access OpenClaw dashboard
Several steps in this guide require running commands inside the sandbox. The easiest way to do that is plain SSH through the gateway. The first command generates an SSH config block and appends it to your~/.ssh/config. The second tests that the connection works:
sandbox: my-assistant.
From now on, ssh openshell-my-assistant drops you into the sandbox, and ssh openshell-my-assistant '' runs a one-liner inside it.
The sandbox runs a web dashboard for managing the agent — reloading skills, browsing sessions, viewing logs. It listens on port 18789 inside the sandbox, so you need a port forward to reach it from your Mac.
First, get the dashboard URL with its auth token:
#token=… fragment. Then start the port forward:
Error: Port 18789 is already forwarded to sandbox 'my-assistant'?
Error: Port 18789 is already forwarded to sandbox 'my-assistant'?
If you get this error, then you are already set, you can go to the next step.
localhost with 127.0.0.1):
Do you have problems connecting to the OpenClaw dashboard?
Do you have problems connecting to the OpenClaw dashboard?
Run
openclaw dashboard before openshell forward. The openclaw dashboard command briefly binds port 18789 to display the URL. If the port forward is already running, the dashboard command will fail with “port in use.” Get the token first, then start the forward.Use 127.0.0.1, not localhost. The gateway’s allowed-origins list includes http://127.0.0.1:18789 but not http://localhost:18789. If you use localhost you’ll see “origin not allowed” in the dashboard.Use openshell forward, not raw SSH tunnels. ssh -N -L 18789:… forwards TCP but doesn’t handle the WebSocket connection the dashboard needs. openshell forward start does both.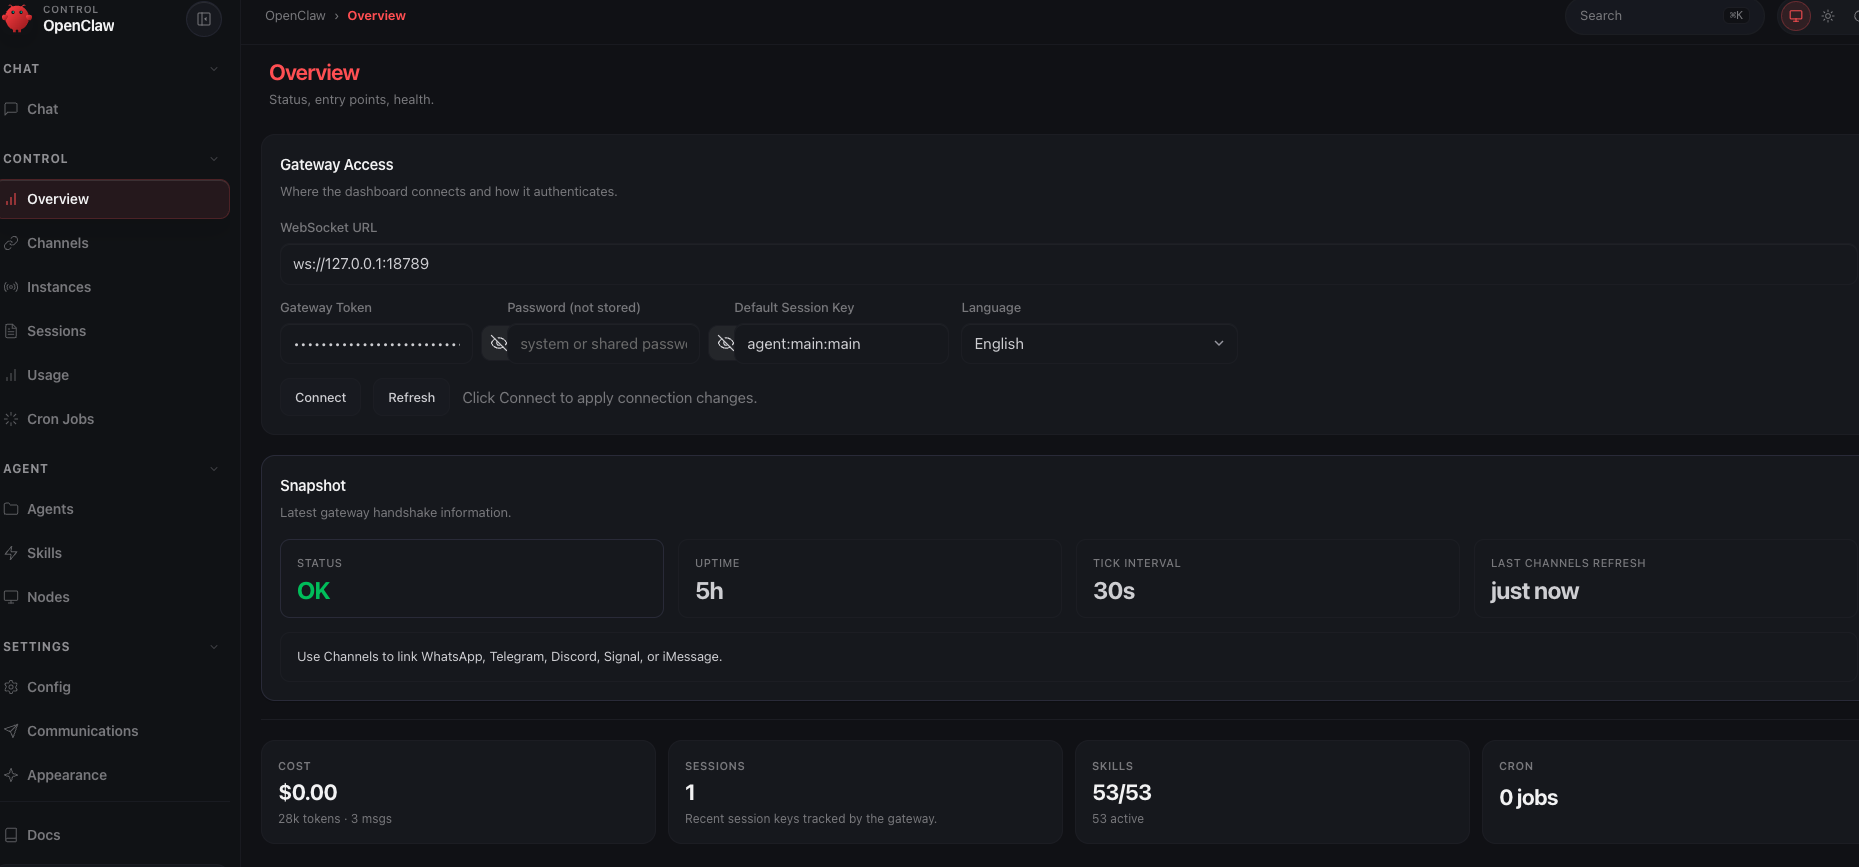
Step 4 — Open the firewall for Bigdata
Your sandbox starts with deny‑by‑default networking. Telegram, GitHub, and PyPI are already open from onboard — everything else, includingapi.bigdata.com, is blocked until you say otherwise. That’s a feature: every external dependency is something you opt into, in writing, by name.
NemoClaw makes this easy with policy presets — small YAML files that bundle a single capability. We’ll add one: bigdata.
4.1 Drop in the Bigdata preset
Create~/.nemoclaw/source/nemoclaw-blueprint/policies/presets/bigdata.yaml:
protocol: restwith explicitrules— the gateway terminates TLS on these hosts, inspects every request, and only allows the listed HTTP methods. This is what makes credential injection (Step 5) possible: the proxy sees theX-API-KEYheader in plaintext and can rewrite the placeholder before forwarding it to Bigdata.s3.amazonaws.comandcontent.bigdata.comwithaccess: full— Bigdata’s upload and download flows are two‑step: the API returns a pre‑signed URL on a separate data‑plane host (s3.amazonaws.comfor upload,content.bigdata.comfor download), and the signature is baked into the query string. The proxy must not terminate TLS or modify headers on those hosts — any change breaks the signature and you get HTTP403 SignatureDoesNotMatch.access: fullcreates a CONNECT tunnel that passes bytes through untouched.binaries— only these executables are allowed to use this rule. A rogue script in another language can’t piggyback on it.
4.2 Apply the preset
policy-add updates the sandbox’s preset list and pushes the merged policy to the live gateway in one shot — no sandbox restart, no downtime.
Confirm it’s active (look for the filled dot ●):
4.3 Smoke test the firewall
You don’t need an API key yet — you just need a 401, not a 403. A 401 means the request reached Bigdata; a 403 means the proxy blocked it.Step 5 — Set up the Bigdata provider with your API key
It is time to get an API key in Bigdata. Remember, the agent will not get to see the key, just a placeholder. We will configure NemoClaw to inject the correct API key.5.1 Create a Bigdata API Key
- Go to Bigdata Developer Platform > API Keys and log in
- Click on “Generate API key”.
- Copy the key somewhere safe. You won’t see it again after you close the dialog.
- Create an environment variable file with your preferred text editor
.envand add the Bigdata API Key
5.2 Store the key in the gateway as a provider
Here’s the part that makes OpenClaw different from “just throw the key in a.env inside the container.”
The sandbox never holds the real key. Instead:
openshell:resolve:env:BIGDATA_API_KEY. The gateway swaps it for the real value on the way out. If the sandbox is ever compromised, the attacker walks away with a string that reads openshell:resolve:env:… — not an API key. This injection logic is handled by the command openshell provider so that is what we will use now.
The command reads the key from your environment, so the variable needs to be exported and not just set, before you run it. The set -a trick exports everything sourced in one shot:
Why not justsource ~/.nemoclaw/.env? That sets the variables in your current shell, soecho $BIGDATA_API_KEYworks fine. Butopenshellis a child process and only inherits exported variables. Withoutset -ayou’ll get--credential BIGDATA_API_KEY requires local env var 'BIGDATA_API_KEY' to be seteven though the value looks present.
BIGDATA_API_KEY:
--credential BIGDATA_API_KEY flag tells the gateway: “read the value from the BIGDATA_API_KEY env var right now, and store it under that name.” This is also the name that goes in the placeholder.
After running this command, you may delete the .env file; we won’t be using it anymore.
5.3 Attach the provider to the sandbox
In the current OpenShell release (v0.0.26), providers can only be attached at sandbox creation time — not to a running one. That means we need to recreate the sandbox. To avoid losing your configuration, we’ll snapshot everything — the network policy, the image tag, and the inference config — then recreate the sandbox with all of it restored, this time with the provider attached. 1. Find the sandbox image tag:openshell policy get --full outputs a metadata header before the actual YAML:
--policy flag only accepts the YAML part. Open ~/pre-recreate-policy.yaml in an editor and delete everything above (and including) the --- line. The file must start with version: 1. If you leave the header in, sandbox create fails with unknown field 'Version'.
Now you have all of the information needed for recreating the sandbox but this time with the my-assistant-bd-key provider:
- Docker image and tag
- Provider name and model
- The policy the sandbox was using (remember to strip the metadata header!)
--policy ~/pre-recreate-policy.yaml— restores Telegram + GitHub + PyPI + Bigdata network presets.--provider my-assistant-telegram-bridge— the Telegram bot token provider, created automatically by the installer. Re-attach it or the bot goes dark after recreation.--provider my-assistant-bd-key— the Bigdata key provider you just created.
5.4 Verify the OpenShell Gateway is properly attached to the OpenClaw agent.
After recreation, OpenClaw may treat the sandbox as an unpaired device. Any command that talks to the gateway’s control plane (cron, devices, some skills) will fail with a pairing prompt until you accept it. If you get an error connecting to the sandbox at this point, connect to it first:openclaw commands complain about pairing, enable the device from inside the sandbox:
5.5 Verify the key is reachable — and still invisible
The sandbox should now be able to authenticate against Bigdata without the real key being anywhere inside it.Step 6 — Turn the experience to eleven: install the skill build-with-bigdata
The
build-with-bigdata skill teaches your agent how to drive the Bigdata public API: document search, volume analysis, co‑mentions, the Knowledge Graph, and file upload/download.
The skill lives in a GitHub repo as a folder with a SKILL.md file and reference docs.
Alternatively, you could point the agent at the raw API documentation, but the skill smooths the process by showing the agent exactly how to structure requests and which pitfalls to avoid.
nemoclaw <sandbox> skill install <path>. It validates the skill, uploads it over SSH, and registers it — all from your Mac.
6.1 Install requests library
The Requests library makes communication with Bigdata easier for the agent; otherwise it will default to using curl commands. That is why we enabled the PyPI policy during installation.pypi policy:
6.2 Clone the plugin repo and install the skill
/sandbox/.openclaw-data/skills/build-with-bigdata/ inside the sandbox.
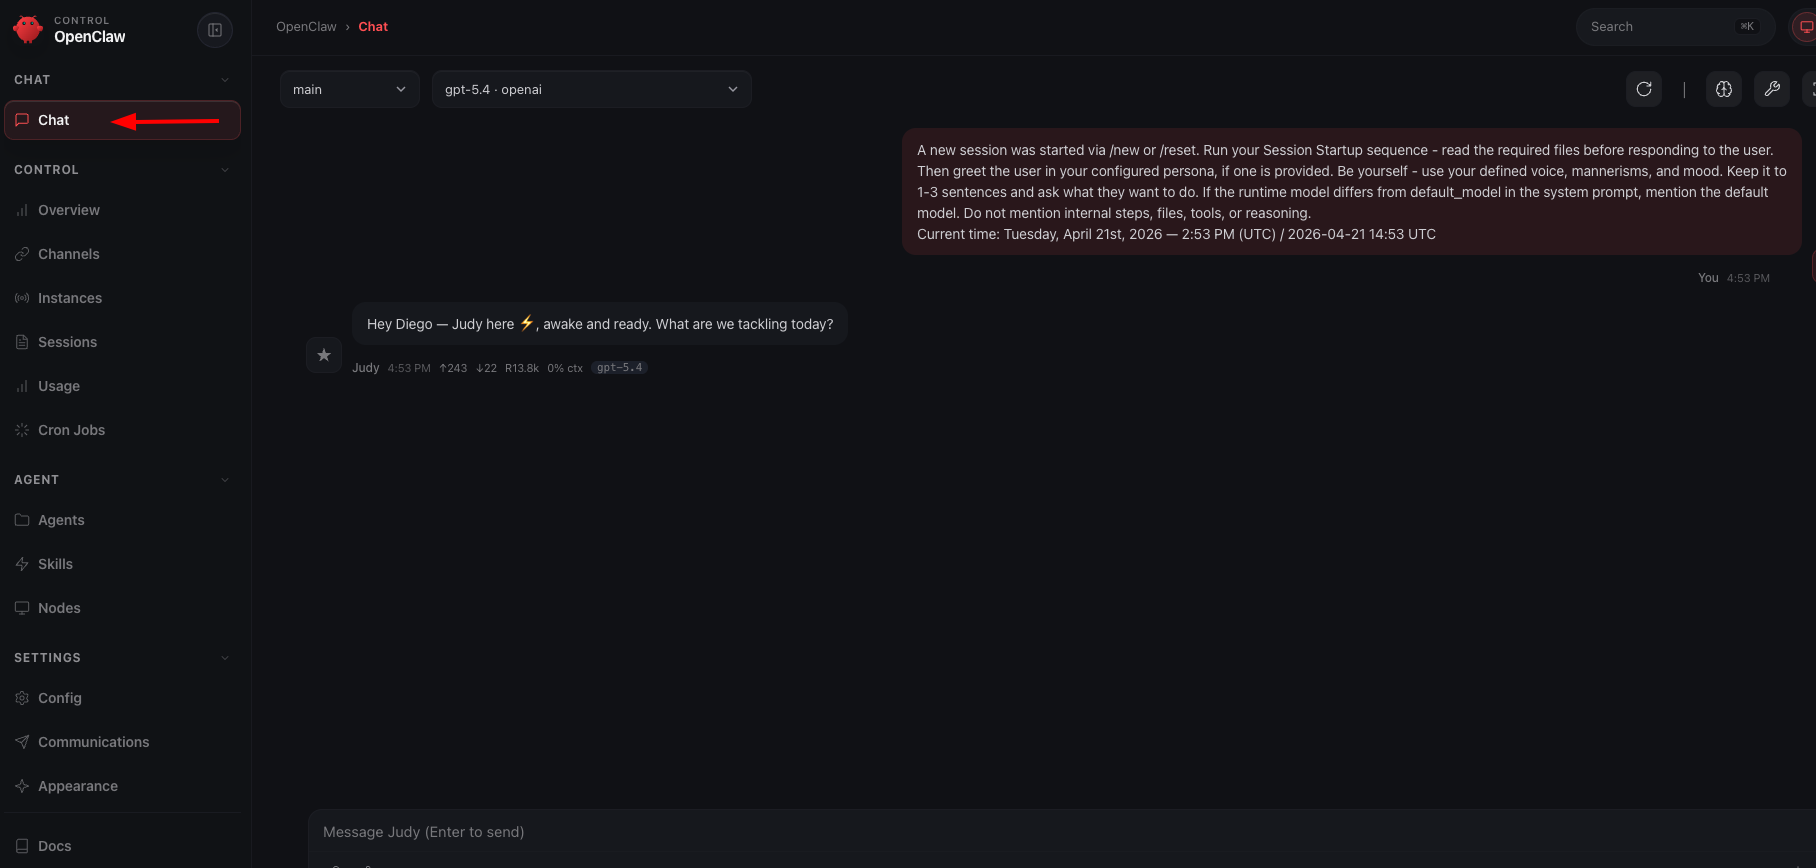
6.3 Reload the agent from the dashboard
The skill is on disk and registered, but the running agent process hasn’t read its contents yet. Until you reload, the agent is in a split state: it knows the skill exists (it can list it) but can’t actually use it — you may see messages like “I can see the skill but can’t access the file.” The dashboard reload is what closes that gap. Open the OpenClaw dashboard (set up in Step 3):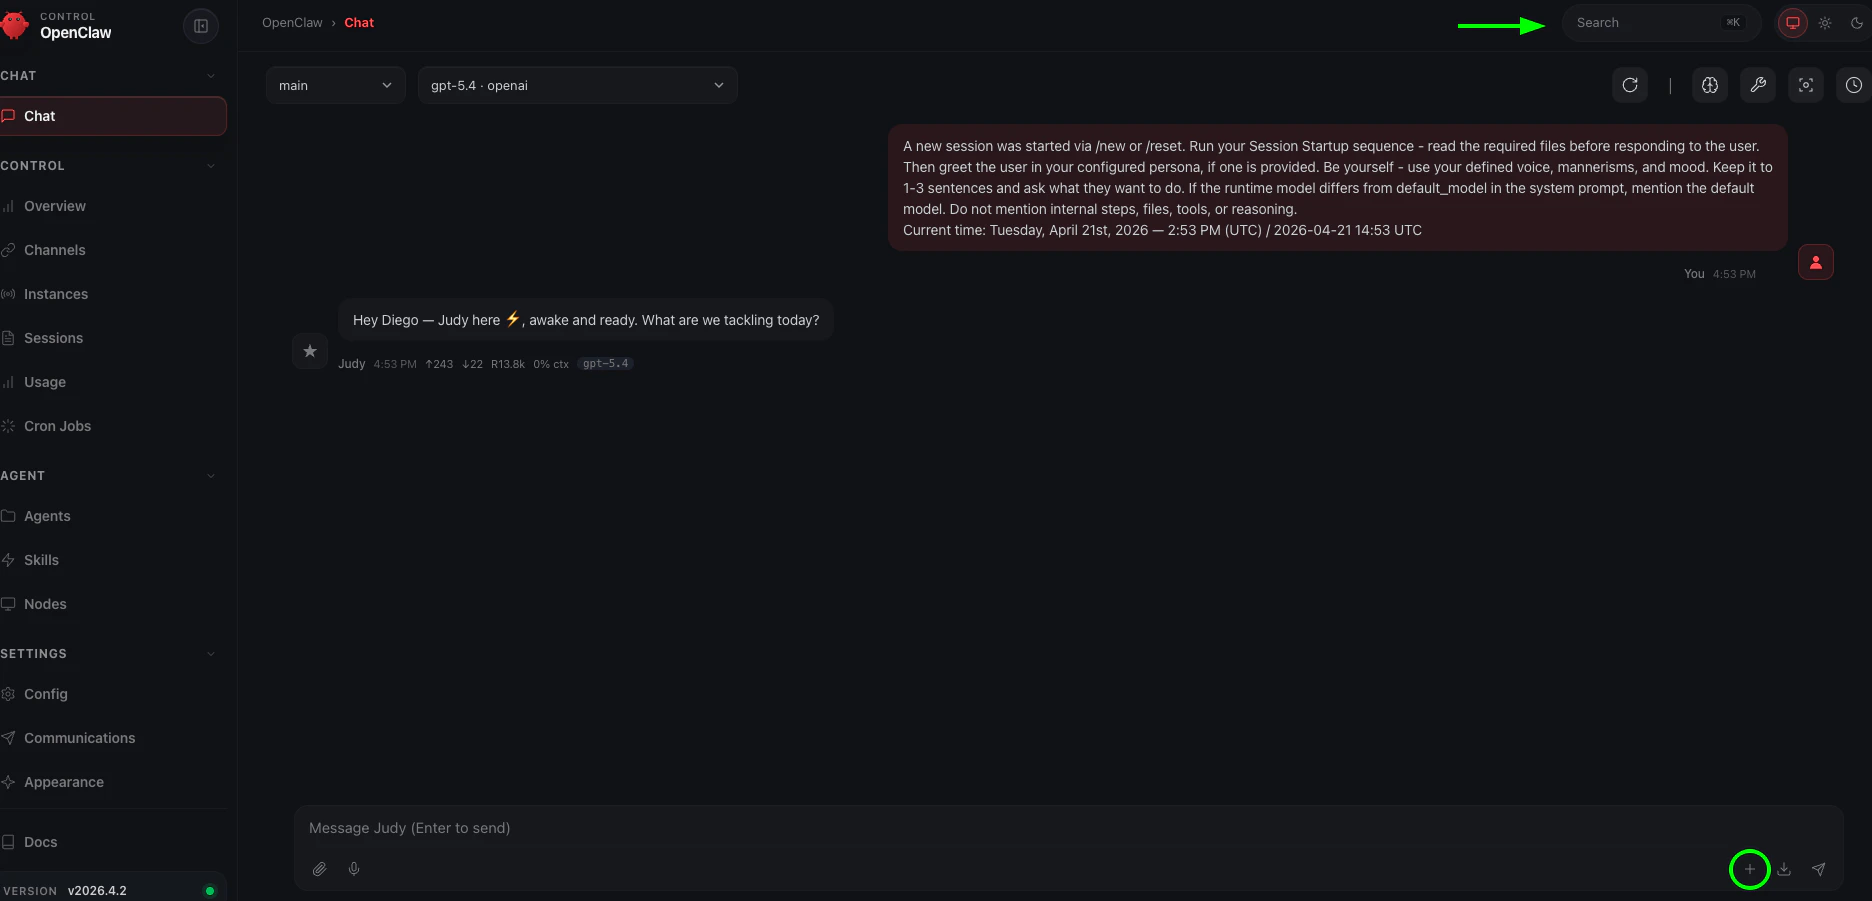
+ button. Click the + button in the dashboard to open a fresh chat. Note that the exact location may vary depending on your OpenClaw version.
Option 2 — the command palette. Click the search bar at the top (the arrow points to it above). Start typing and a popup will appear — type /new to start a new session.

build-with-bigdata in its available skills.
Why not just message the bot?
Why not just message the bot?
The agent’s session caches which skills are available when it starts. A skill installed after the session began won’t be picked up until the agent reloads. The dashboard reload is the clean way to trigger this.
The agent says it can see the skill but can't read the file
The agent says it can see the skill but can't read the file
The registered path likely contains a
~ that didn’t expand correctly in the agent’s runtime context. Tell the agent to use the absolute path directly:“Read the skill at /sandbox/.openclaw/skills/build-with-bigdata/SKILL.md”That path always works regardless of how ~ resolves in the current session.6.4 Confirm the skill loaded
Send a message to the bot on Telegram:What skills do you have available right now?A correct answer mentions
build-with-bigdata along with whatever skills ship in the base image.
Where you are now
- ✅ NemoClaw installed, onboarded, reachable from Telegram.
- ✅ The sandbox can reach Telegram, GitHub, PyPI, and Bigdata — and nothing else outside of what NemoClaw ships by default.
- ✅ Your Bigdata API key is stored in the gateway. The sandbox only holds the placeholder.
- ✅ Your agent knows how to use the Bigdata API, via a skill it installed itself from a chat message.
nemoclaw my-assistant connect but that’s it!
Step 7 — See the agent in action: creating a daily portfolio brief
Everything is wired up. This step shows a concrete end-to-end workflow: you tell the agent which stocks you follow, ask it to pull a 24-hour summary from Bigdata, and then schedule that report to run automatically every day. All from Telegram, without touching a single config file.7.1 Tell the agent your portfolio
Send your bot a message on Telegram:Remember my portfolio: NVIDIA, META, MSFT. From now on, whenever I ask for a portfolio update, use these three tickers.The agent stores this in its session memory. You won’t need to repeat the list in follow-up prompts.
7.2 Request a 24-hour financial report
Generate a financial report for my portfolio covering the last 24 hours. Include key metrics (price change, volume, sentiment score), links to the source documents, and format it for mobile: short paragraphs, bullet points, no wide tables.The agent will call the Bigdata Search and Volume endpoints, pull relevant news and filings, and compose the report.
7.3 Schedule the report, deliver it to Telegram, and upload it to Bigdata
Once you are happy with the output, ask the agent to automate it:Schedule this report to run every day at 8 AM. Each time it runs, send the result to me on Telegram and upload it to Bigdata so I can retrieve it later.The agent will use the OpenClaw cron skill to register the schedule, the Telegram channel to deliver the report to your phone, and the
build-with-bigdata upload flow to persist each result. From this point on, your portfolio brief arrives on Telegram every morning and is indexed in Bigdata without any manual steps.
What just happened? Your agent queried the Bigdata API through the allowlisted proxy, the gateway injected the real BIGDATA_API_KEY header on the way out, and the response came back without the key ever touching the sandbox. The schedule runs inside the sandbox on the same sandboxed network, so even the automated job can only reach the domains you explicitly opened in Step 4.
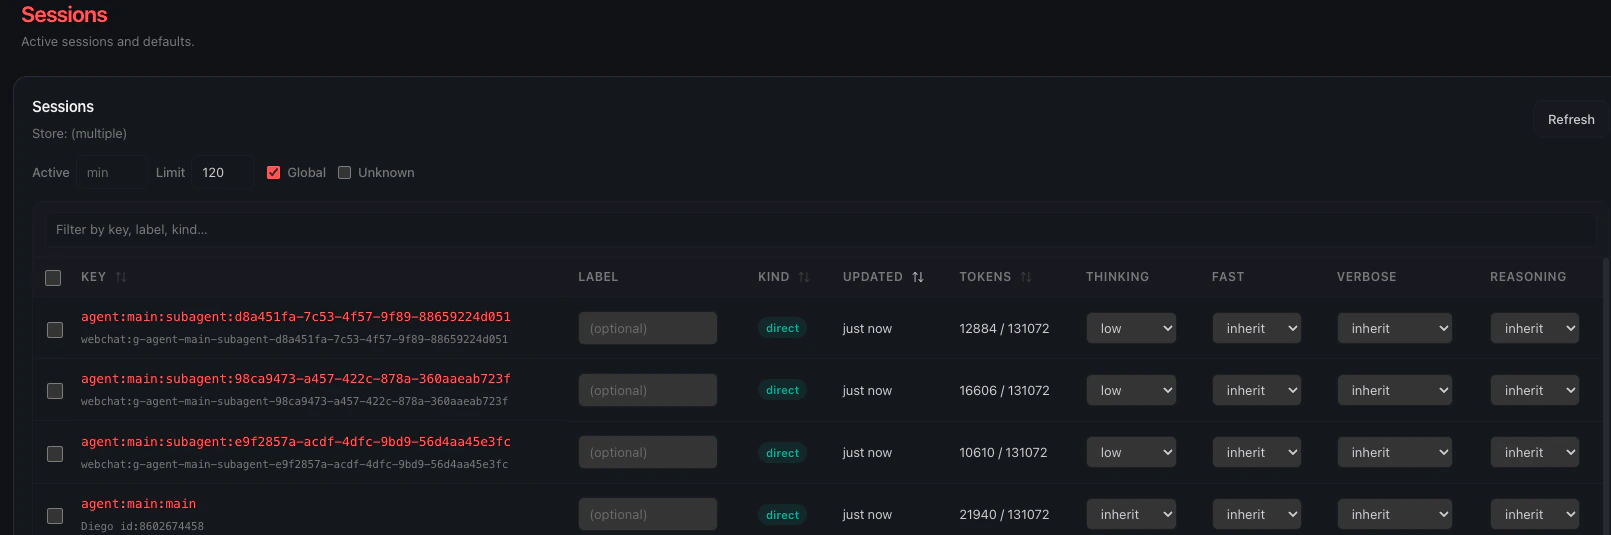
When the report gets complex enough, OpenClaw will automatically spawn sub-agents to work on different parts in parallel: one fetching news, another pulling volume data, another formatting the output. The dashboard makes this visible:
Diego de Aguilar
Senior Backend Engineer