

Overview
This guide walks you through connecting Perplexity to the Bigdata.com Remote MCP as a custom MCP connector with OAuth authentication. Once connected, Perplexity can search financial news, filings and transcripts, resolve securities, and build research reports grounded in Bigdata.com content. The setup has two parts: you first create an OAuth client for Perplexity in the Bigdata.com Developer Platform, then you register the Bigdata.com MCP server in Perplexity using that client’s credentials. Each user then logs in to Bigdata.com with their own account the first time they use the connector. On a Perplexity Enterprise plan, an organization admin configures the connector once and enables it for all organization members, who only need to log in to Bigdata.com. See Enterprise workspaces.Requirements
- A Perplexity plan that supports custom connectors. At the time of writing, custom MCP connectors are available on Pro, Max and Enterprise plans.
Configuration Steps
1
Open the OAuth Clients page
Go to Developer Platform > OAuth Clients and click Create OAuth Client.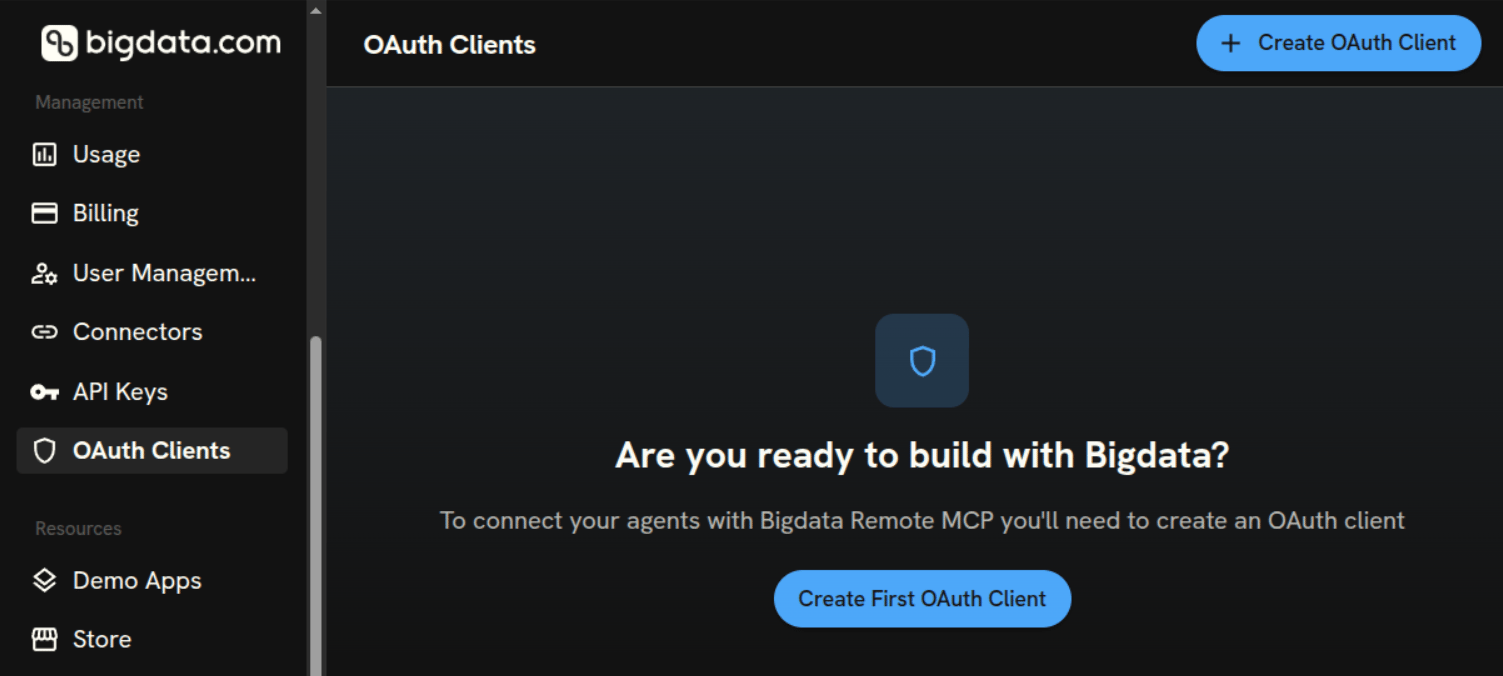
2
Create the OAuth client for Perplexity
Fill in the Create New OAuth Client form: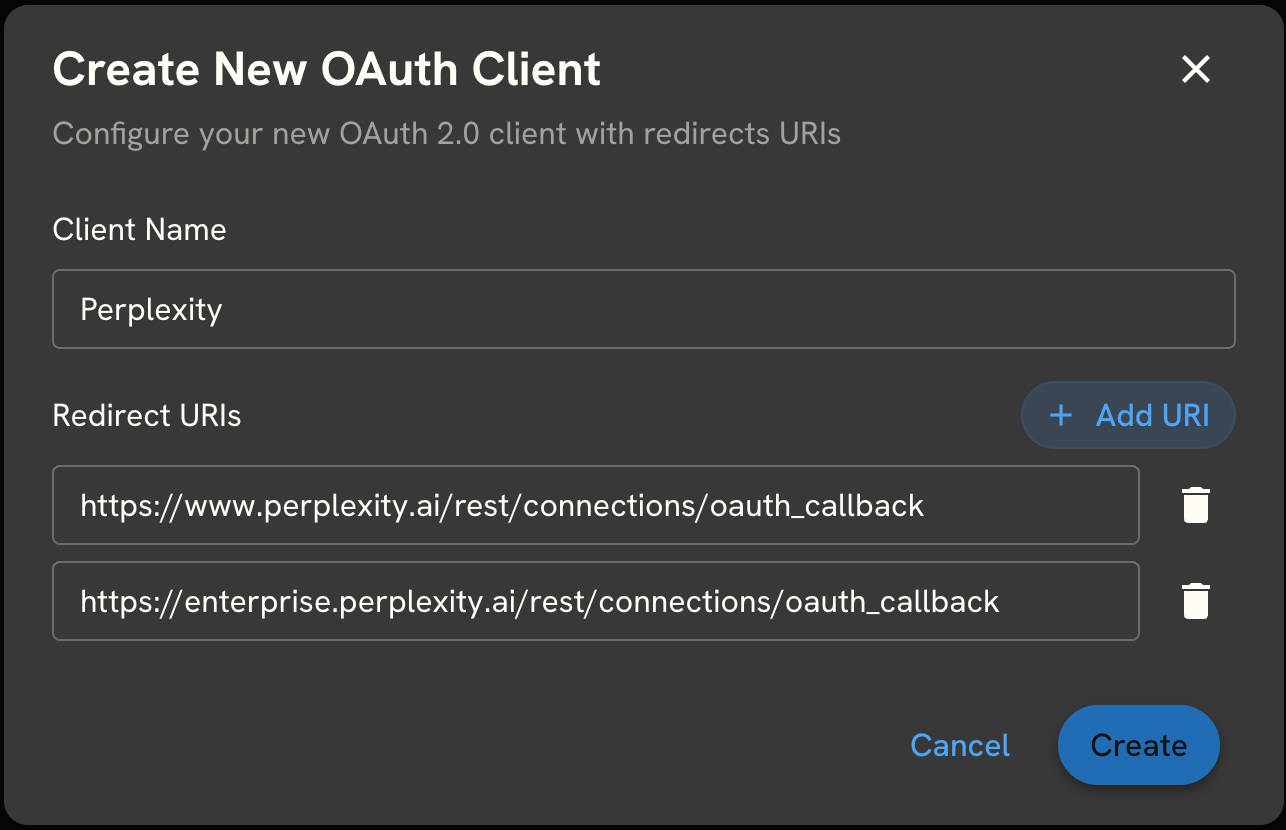
-
Client Name:
Perplexity -
Redirect URIs: add the Perplexity callback URL.
If your organization also uses Perplexity Enterprise, click Add URI and add the Enterprise callback URL as well.
3
Store the client credentials
The Developer Platform shows the Client ID and Client Secret of the new client. Copy both and store them in your password manager. You will need them in the next step.The new client now appears in the OAuth Clients list with its Client ID and redirect URLs.
4
Add the MCP connector in Perplexity
Open Perplexity in your browser and go to Settings > Connectors. Click + Custom connector in the top-right corner and select Add MCP connector.
5
Configure the Bigdata.com connector
Fill in the connector form with the following values: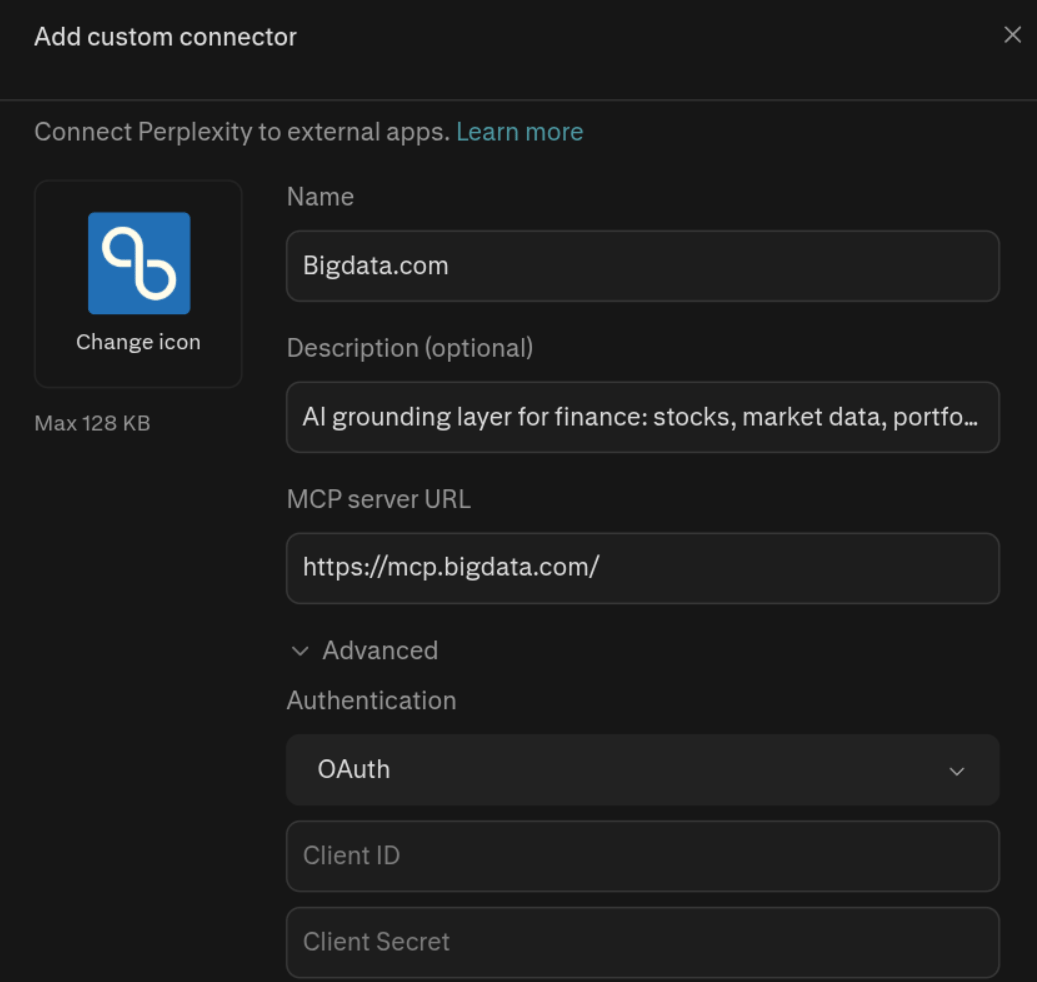
-
Name
-
MCP Server URL
-
Description (Optional)
- Icon: upload the Bigdata.com logo. You can download it from here
- Authentication: select OAuth
- Client ID: paste the Client ID from Step 3
- Client Secret: paste the Client Secret from Step 3
- Transport: select Streamable HTTP
6
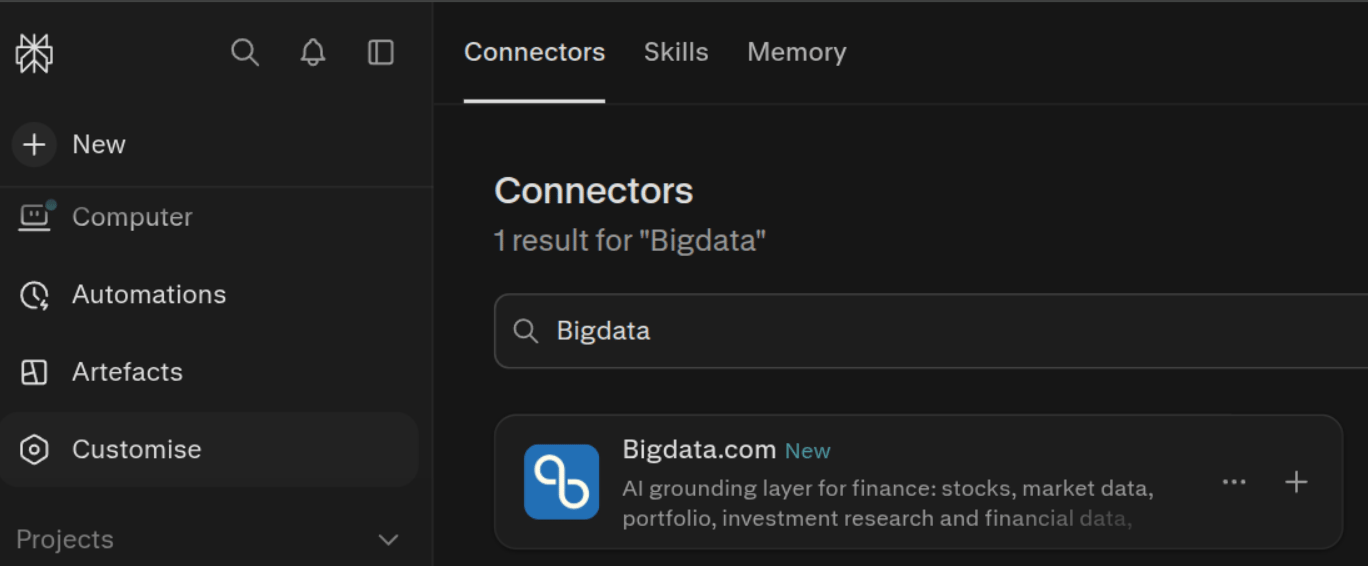
Enable the connector
Click the + button on the Bigdata.com connector card, then click Add connector.
bigdata_search, find_securities and bigdata_company_tearsheet. For the complete list, see the Bigdata MCP tools overview.7
Try it out
Start a new chat, type Perplexity calls the Bigdata.com MCP tools during its reasoning loop, retrieves grounded financial content, and answers with citations that link back to the source documents.
@Bigdata.com and select the connector from the suggestions, then ask any question about your financial research. For example:Enterprise workspaces
On Perplexity Enterprise, administrators control which connectors members can use. To make Bigdata.com available to your organization:- Make sure the OAuth client created in Step 2 includes the Enterprise redirect URI,
https://enterprise.perplexity.ai/rest/connections/oauth_callback. - In Perplexity, go to Enterprise settings > Permissions > Connectors permissions, click + Custom connector and select Add MCP connector.
- Fill in the same values as in Configure the Bigdata.com connector.
Troubleshooting
The login redirect fails with an invalid redirect URI error
The login redirect fails with an invalid redirect URI error
The redirect URI registered in the OAuth client must match the one Perplexity uses exactly. Check that the client in Developer Platform > OAuth Clients contains
https://www.perplexity.ai/rest/connections/oauth_callback, and https://enterprise.perplexity.ai/rest/connections/oauth_callback for Perplexity Enterprise. Edit the client to add a missing URI.Perplexity rejects the Client ID or Client Secret
Perplexity rejects the Client ID or Client Secret
Copy both values again from your password manager and check for leading or trailing spaces. If the secret was lost, delete the OAuth client, create a new one with the same redirect URIs, and update the connector in Perplexity with the new credentials.
Perplexity answers from the web instead of Bigdata.com
Perplexity answers from the web instead of Bigdata.com
Type
@Bigdata.com at the start of your prompt to select the connector explicitly. Without the mention, Perplexity decides which tools to call based on the question, and may answer from the public web instead.Can I use an API key instead of OAuth?
Can I use an API key instead of OAuth?
Perplexity custom connectors also accept an API key. OAuth is the recommended option because each user logs in with their own Bigdata.com account and no long-lived key is stored in Perplexity. If you still prefer an API key, create one in the Developer Platform and send it in a header named
x-api-key. See MCP Integration with API Key.Remove the connector
Remove the connector
Go to Settings > Connectors in Perplexity, open the Bigdata.com connector and choose to remove it. To revoke access for everyone who used the client, delete the OAuth client in Developer Platform > OAuth Clients.